As I’ve repeated throughout this site, I’m all about learning new web skills and technology. When I made the decision to enter this field in 2014 (after going to school for film, no less), I knew an appetite for learning was the only way forward. After all, the new hotness in the web development world is always changing. The tech stack at your workplace can’t be changed on a whim, so oftentimes I’d have to make demo projects to practice and more importantly, show off the new skills.
My most recent study undertaking has been GraphQL after it was suggested to me at a job interview. After learning more about it, I found out it’s a major component of Gatsby, which had also been suggested to me in the past as a potential alternative for fighting with WordPress themes. After learning the basics of GraphQL from tutorials on its official website, I worked through two helpful Udemy courses: GraphQL with React: The Complete Developers Guide and Gatsby JS: Build Gatsby static sites with React & WordPress. I was ready to put those skills to use.
Since I like to periodically refresh my personal website anyways, I figured why not use them to upgrade it? A content management system would be great for easily updating page sections and adding new portfolio items. Plus, I wanted to add a blog. The previous setup of this site was mostly manual, a static React site that required a lot of hard coding for page content. From the outside it looked pretty, but under the hood it could be so much better.
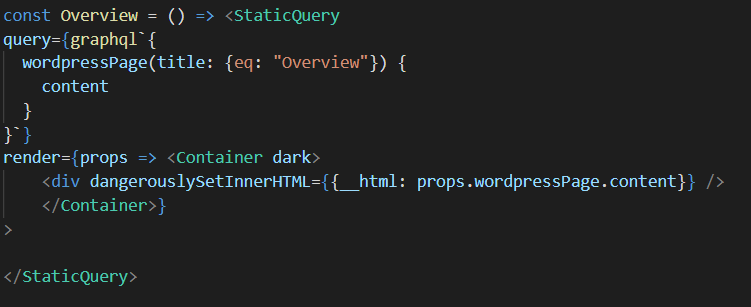
First off, I began with a Gatsby starter and set out to determine the exact needs of the site and the GraphQL queries it would involve. I’m quite partial to the design of this website, so I didn’t want to throw huge chunks out. Thus, it required some extra post types and custom fields for said posts. Regular pages inside WordPress would be fine for sections such as the Overview and About, but the Portfolio and Resume sections needed their own post types.
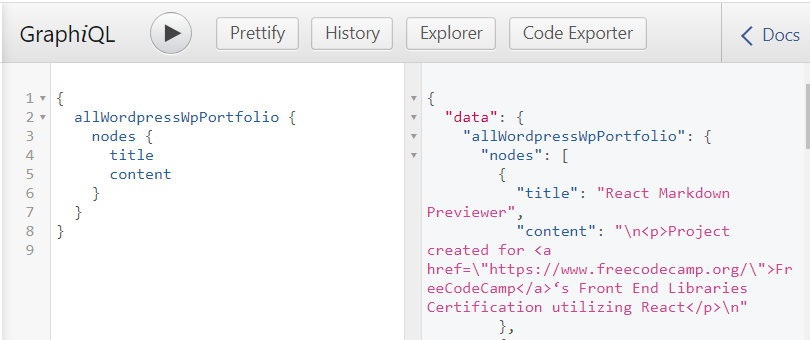
My WordPress installation needed three plugins to accomplish this goal: Advanced Custom Fields, ACF to REST, and Custom Post Types UI. Custom Post Types allowed me to create the specialized post types, Advanced Custom Fields let me populate said new post types with needed fields (such as a URL field for the portfolio projects), and ACF to Rest made said fields accessible in GraphQL queries. All in all, the GraphQL queries ended up looking like this:
From there, it was just a matter of linking up the various sections/components of the page to corresponding queries to pull the designated content.
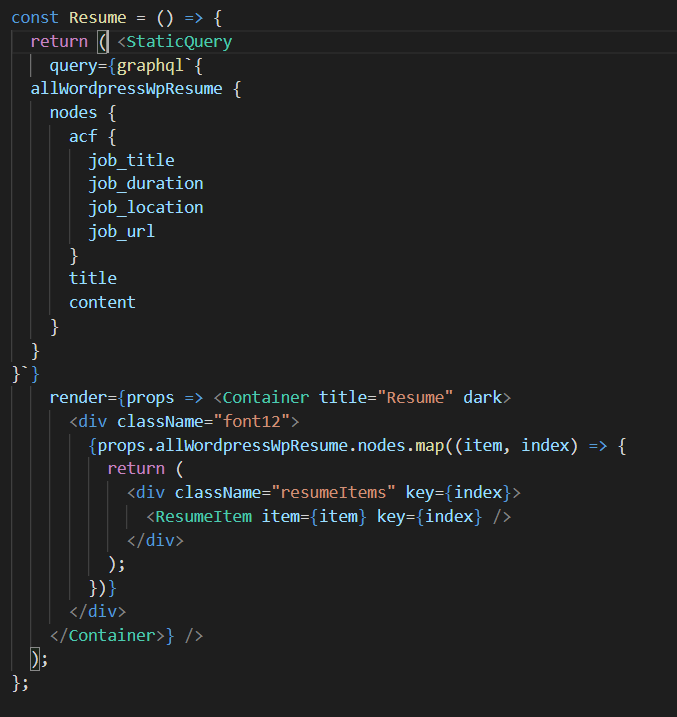
The custom post types, of course, required a more specified GraphQL query:
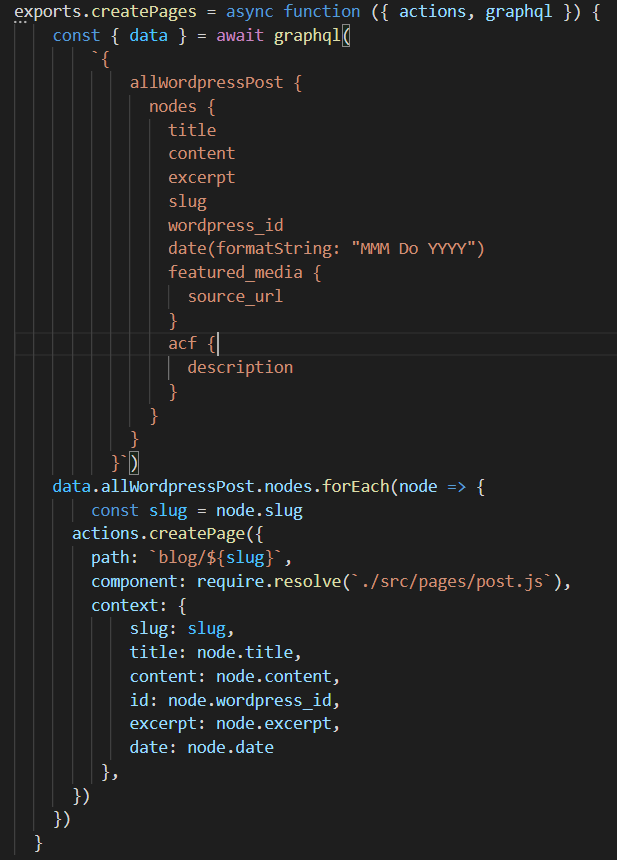
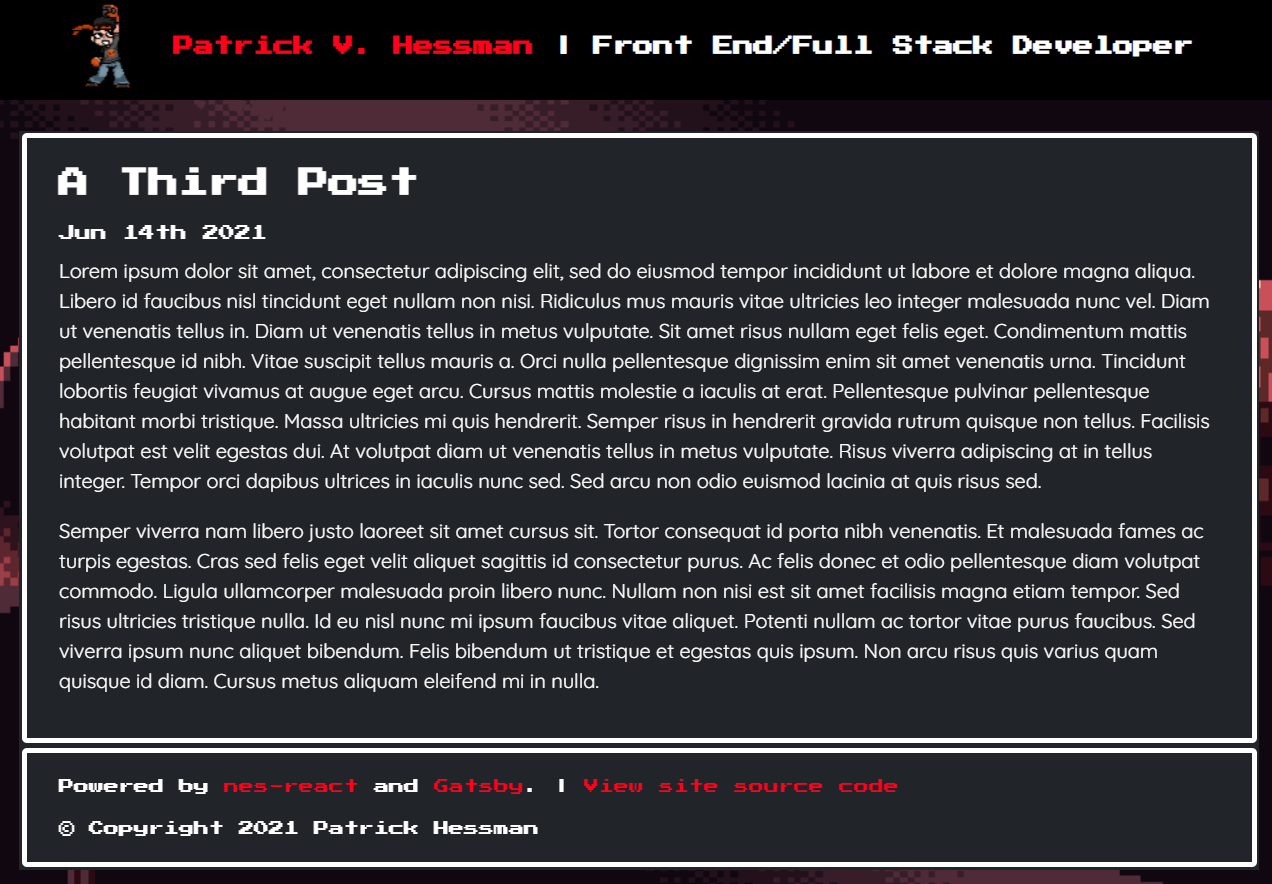
The most complicated part of this entire process was incorporation of regular blog posts into this site. That was the entire aim of redoing the site in Gatsby, after all. Unlike the components that only needed to query a single page or a simple custom post type, the queries needed for creating individual pages for the blog posts couldn’t be done inside StaticQuery. For that, I had to utilize the gatsby-node.js file, which is included in installations of Gatsby. In this file, I had to perform a query for the blog posts, then use the createPage function to create a route for each blog post and link it to the post template file.
And, voila:
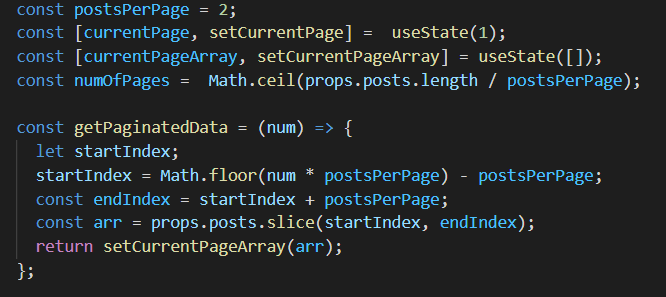
Lastly, I wanted to create a pagination component for the home page. This component could mostly work with a Static Query, but it needed some fiddling to only display the specified number of posts at a time. I accomplished this by feeding the result of the posts query into the component and manipulating the array to only show two posts at a time. When the back and forward controls on the component are used, the start and end indexes on the slice function operating on the main array are changed:
And here is the result:

I am planning more upgrades for the blog component of this site in the future, likely when I have more blog posts to manage/catalog. Learning Gatsby was an interesting experience, and I’m always excited to add another arrow to my quiver of skills. If you’re interested in seeing the code in depth, check out the website’s GitHub repo.